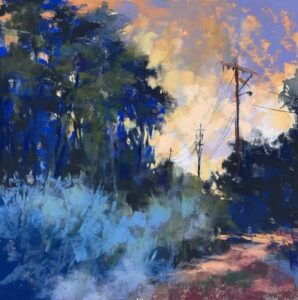
Forget about dipping your toe. Dive right into pastel painting course—with both hands! Many folks hear “pastels” and picture bright sidewalk scribbles or old-school portraits, but there’s so much more behind these buttery, colorful sticks. And if you’re curious about 和諧粉彩, that gentle, harmonious style popular in Japan, you’re starting someplace truly inspiring.
First, let’s talk about layering. Pastels aren’t shy; they love to mingle. Grab a few chalky sticks and scribble light layers, one over another. Build color slowly rather than slapping it on like peanut butter. Start with your lightest hues and tiptoe into deeper tones, blending as you go. Trust your fingers—they’re sometimes the best ‘brush’ you’ll own.
Speaking of blending, here’s a trick: don’t just use your fingers. Try cotton swabs, sponges, or even bits of tissue paper for softer transitions. Some artists swear by those unlikely little eyeshadow applicators—they’re cheap, and they work wonders! Each tool creates a different effect.
Now, dust control isn’t glamorous, but it’s important. Pastel pigments are notorious for flying everywhere. Tap your work gently to remove excess before adding new layers. Work upright if you can; gravity helps keep unwanted smears at bay.
Value and contrast can make or break a pastel piece. Squint at your subject. Notice where light hits and where shadows pool. Sketch those patterns in first, using a gray or blue pastel to map shadows. Only after you’re happy with your shapes, add pops of color. This method saves headaches later, trust me.
Let’s talk surfaces—paper matters a lot! Smooth papers are forgiving, while textured ones grip pigment and let you stack layers high. Sanded papers are especially popular for those juicy, thick colors. Don’t be afraid to experiment; tear up an old grocery bag and scribble on it, if you wish. The results can surprise you.